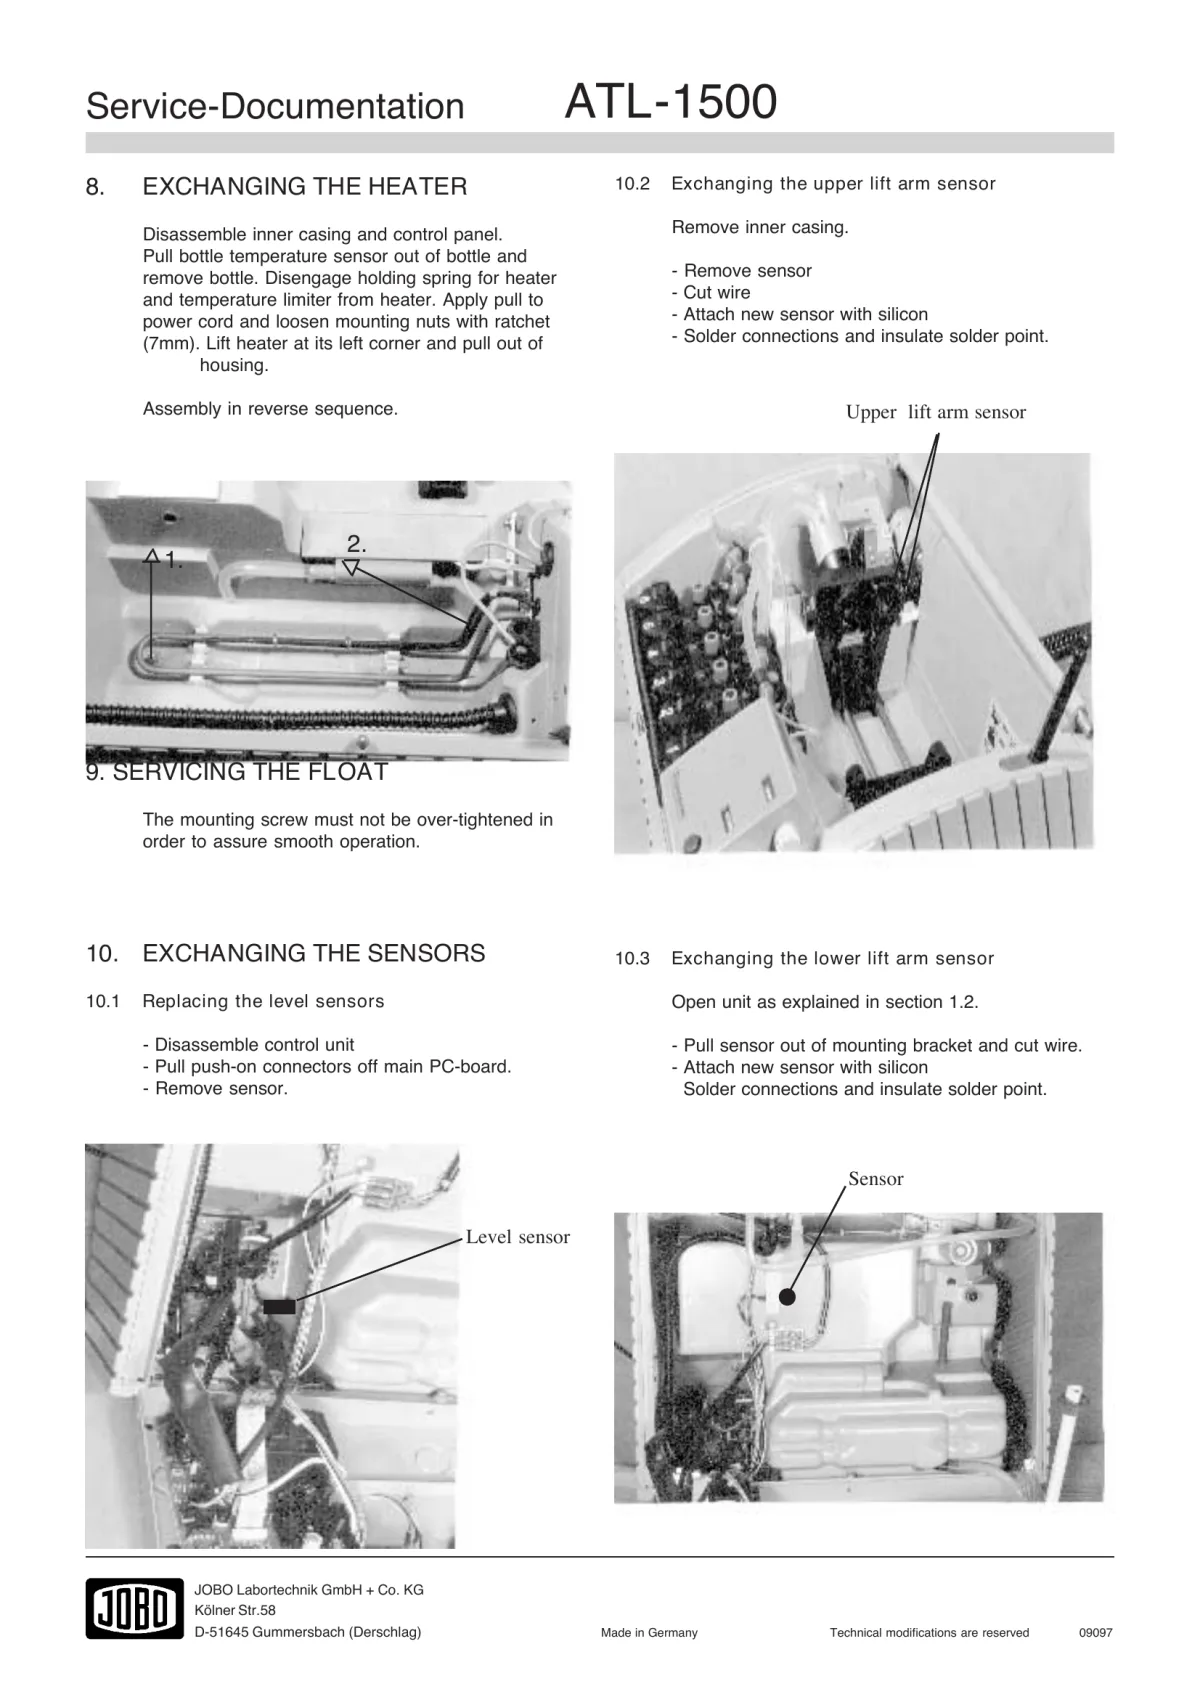
Symptom: the lift arm sometimes rises on its own during a process and stays in the raised position instead of returning to normal cycling — reported to have happened mid-run on a reversal-stage E-6 process, with the film only saved because it was caught in time. Equipment: JOBO AutoLab ATL-1500 Sources: JOBO ATL-1500 service documentation (sections 10, 11, 14, and the built-in “Servicemenue ATL 1500” diagnostic test), JOBO AutoLab ATL-1000/ATL-1500 instructions
1. How the lift arm is built and controlled
The lift arm is driven by its own dedicated motor (the lift arm motor), and its position is tracked by two separate sensors:
- Upper lift arm sensor — confirms the arm has reached the raised position
- Lower lift arm sensor (referred to as the “level sensor” in the service documentation) — confirms the arm has returned to the lowered position
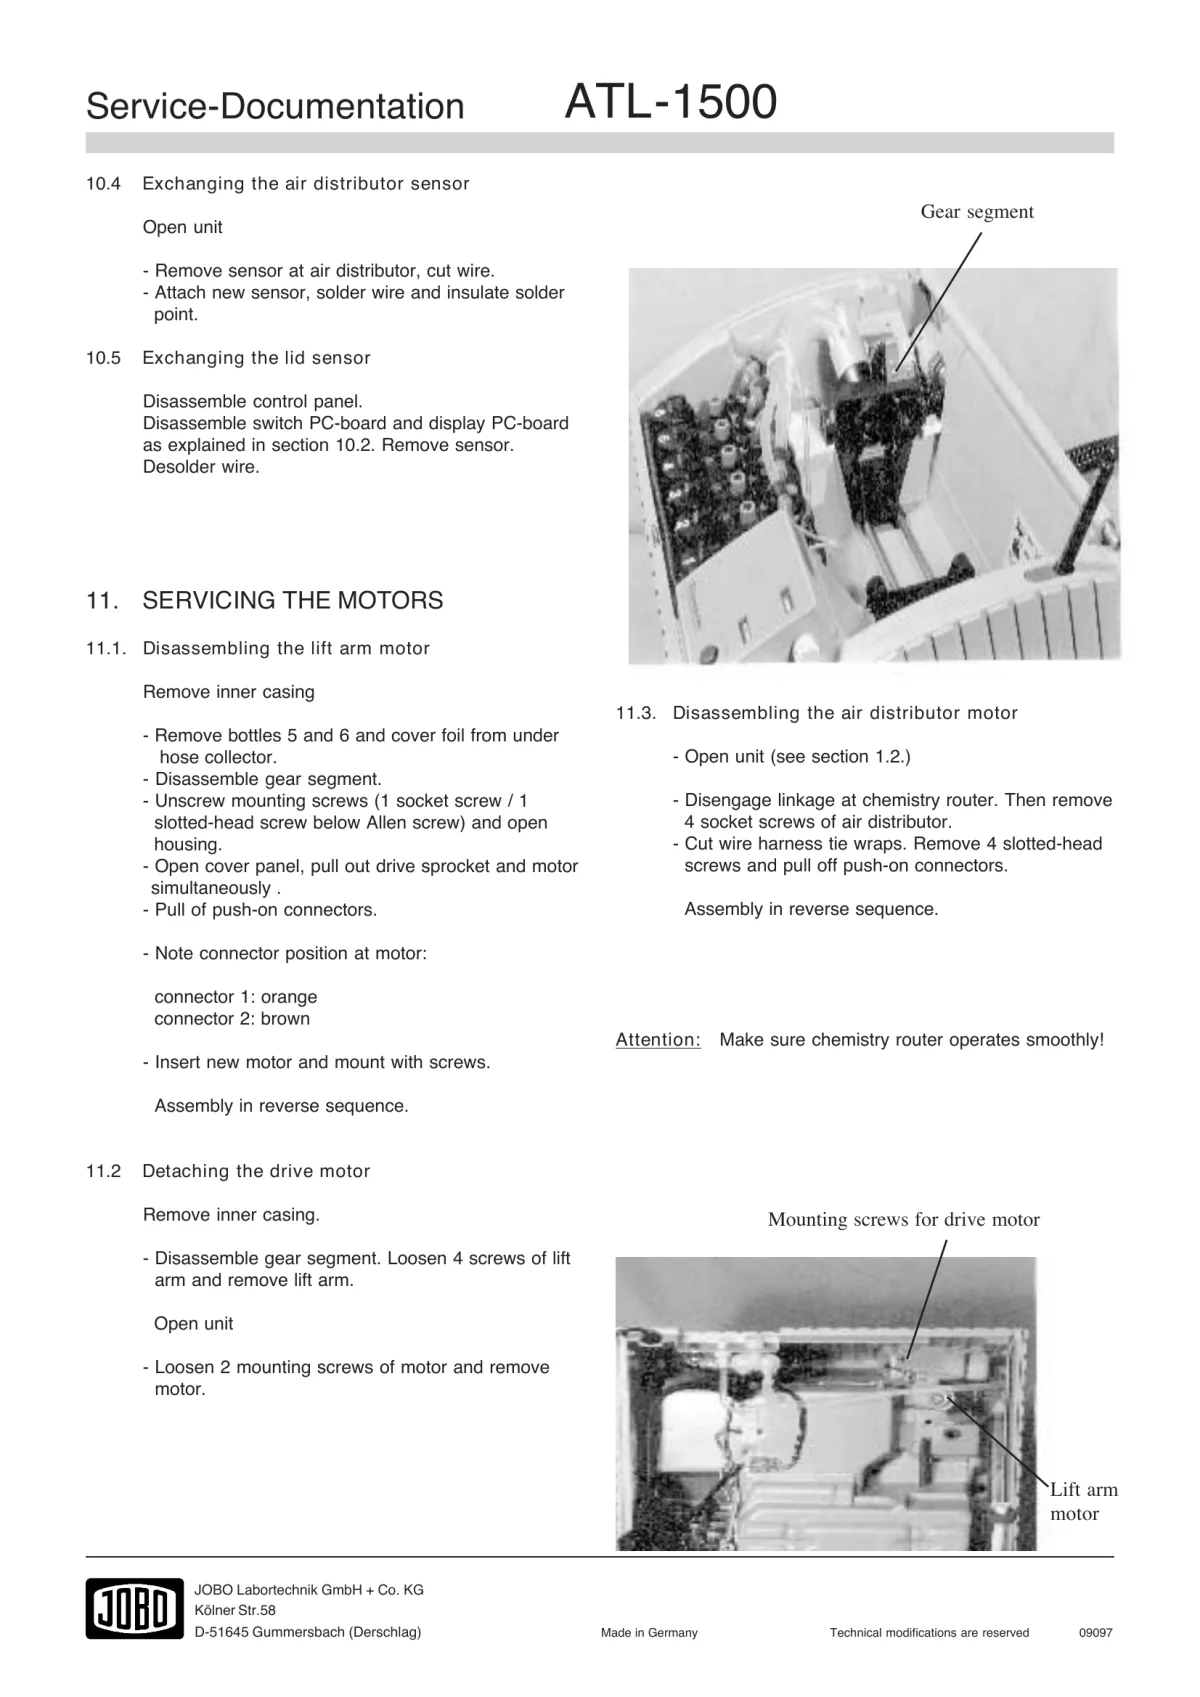
The arm’s motion is transmitted through a gear segment and a transfer sprocket (a toothed drive wheel) connected to a square drive shaft.

There is also a cover sensor (lid sensor) that interacts with lift arm logic — the service manual’s built-in diagnostic explicitly notes that lift arm movement can only be tested “if the cover is closed or a magnet is put to the sensor,” meaning the control logic ties lift arm permission to the cover/lid sensor state as well, not just the two lift sensors themselves.
2. Most likely causes, ranked
No single root cause is documented in the manual for this exact symptom — the following is an engineering assessment based on the documented construction of the lift mechanism (sensors, motor, drive train), not a direct quote from a troubleshooting table.
2.1 Upper or lower lift arm sensor — dirty, misaligned, or intermittent (most likely)
This is the classic cause of exactly this symptom. If the upper sensor fails to reliably report “arm is up,” or reports it falsely, the controller can either keep driving the arm upward after it has already reached the top, or lose track of when it’s safe to command it back down. A sensor with an intermittent fault (rather than a fully dead one) produces exactly the random, not-every-time pattern described here — it works most of the time and fails occasionally, which is very different from a component that’s simply broken.
2.2 Loose or corroded push-on connector at the lift arm motor or sensors
The service documentation explicitly calls out push-on connectors at the lift arm motor (with a specific note to track “connector 1: orange, connector 2: brown” during reassembly) and at the sensors. A push-on connector that’s slightly loose, or has started to oxidize, will cause exactly this kind of unpredictable, hard-to-reproduce fault — solid most of the time, dropping out under vibration or thermal expansion. This is a very common failure mode in equipment of this age and is worth checking before assuming a sensor or motor itself is bad.
2.3 Worn or slipping gear segment / transfer sprocket
The lift arm’s motion is transmitted through a gear segment and a transfer sprocket on a square shaft. If a tooth is worn or the sprocket has developed play, the arm’s actual physical position can drift out of sync with what the controller believes it commanded — the controller may think the arm should be at a given position (based on motor steps or its internal logic) when it physically isn’t, and get stuck waiting for a sensor state that never arrives, or holding the arm up because it “thinks” it hasn’t finished the up-stroke yet.
2.4 Lift arm motor fault
A partially failing motor (weak brushes, intermittent winding fault) can behave inconsistently from cycle to cycle — sometimes completing its stroke correctly, sometimes stalling partway or overshooting, which again produces the “random” pattern rather than a clean, repeatable failure.
2.5 Main control PC-board logic fault
The main PC-board reads all the sensors and drives the lift arm motor. A marginal fault here (rather than a hard failure) could misinterpret sensor states intermittently — again consistent with a random rather than constant failure.
2.6 Mechanical binding in the lift arm itself
Not necessarily electrical at all — chemistry residue, corrosion, or a slightly bent guide can cause the arm to bind specifically near the top of its travel, especially if this only happens under certain conditions (e.g., a particular tank/drum weight or a slightly different resting position each time it’s raised).
3. Why this matters specifically for reversal-stage E-6 processing
Reversal processing has a fixed step sequence where the lift arm is used to withdraw the drum for a specific chemistry step. If this keeps happening at the same point in the program rather than at random points across different runs, that’s an important diagnostic clue — it would point toward a logic/sensor-state issue tied to that specific program step, rather than a purely mechanical fault that could strike at any time. Worth tracking going forward: does it always happen at the same step, or does it vary?
4. Built-in diagnostic — use this before disassembling anything
The ATL-1500 has a built-in service test menu that lets you manually exercise the lift arm outside of a real process — this is the fastest way to narrow down the cause without guessing.
Entering service test mode:
- Set the BCD-switch to position 16.
- Press PLUS and ENTER simultaneously while switching the unit on (this enters “SET DEF” / default-values mode).
- Simulate a closed cover by placing a magnet on the sensor on the left side of the control unit (required — the lift arm test will not run otherwise).
- Press PLUS. The display will show
---.
Lift arm test specifically:
- Set the BCD-switch to position 2. The display will show
Li. - Press PLUS — the lift arm should move up, and a green LED should light.
- Press ENTER — the lift arm should move down, and the green LED should turn off.
Run this test repeatedly (10-20 cycles) and watch for:
- Does it fail to go up, fail to come down, or randomly stick, matching the real-world symptom?
- Does the green LED behave consistently with the arm’s actual physical position, or does it disagree (e.g., LED says “up” but the arm hasn’t physically moved, or vice versa)? A mismatch between the LED/sensor state and the physical position points straight at a sensor or connector fault rather than the motor or gears.
- Does wiggling the wiring near the lift arm motor or sensors while running this test trigger a failure? This is a fast way to catch an intermittent connector problem.
There’s also a related drum motor / filling pump test (BCD position 1) if you want to rule out other motor issues while you’re in the service menu.
5. Practical inspection order
- Run the built-in lift arm test (section 4 above) repeatedly first — this alone may reproduce or rule out several causes without opening the unit.
- Check the push-on connectors at the lift arm motor and at both lift arm sensors — unplug and reseat them, look for oxidation or a loose fit. (Requires opening the inner casing per section 1.2 of the service documentation.)
- Inspect the upper and lower lift arm sensors for dirt or misalignment in their mounting bracket.
- Inspect the gear segment and transfer sprocket for worn teeth or play — remove the gear segment per section 14.2 if a closer look is needed.
- Track whether the fault correlates with a specific program step (especially the reversal step) across future occurrences — this distinguishes a logic/sensor-state issue from a purely random mechanical one.
- If the built-in test reproduces the fault cleanly and the connectors/sensors check out, the lift arm motor or the main PC-board become the next suspects, in that order — both require deeper disassembly (sections 11.1/11.2 and 15.3 of the service documentation) and are best done after ruling out the simpler causes above.
6. Immediate safety note
Since this already put a batch of slide film at risk once, until the cause is confirmed and fixed: stay near the machine during any run and watch for the lift rising unexpectedly, especially during the reversal step, so you can intervene the same way as before. This isn’t a fix, just a stopgap while working through the list above.